Virtual Industrial Cybersecurity Lab – Part 1: Installation and Configuration of pfSense
In this post, I will cover how to install a virtual instance of pfSense in VirtualBox but before we start, there are several key concepts that are needed in order to follow the explanation and understand why things are set up in a certain way. In particular, why and how to choose the correct adaptor for our virtual network to operate properly.
Let’s start by analyzing our target design:
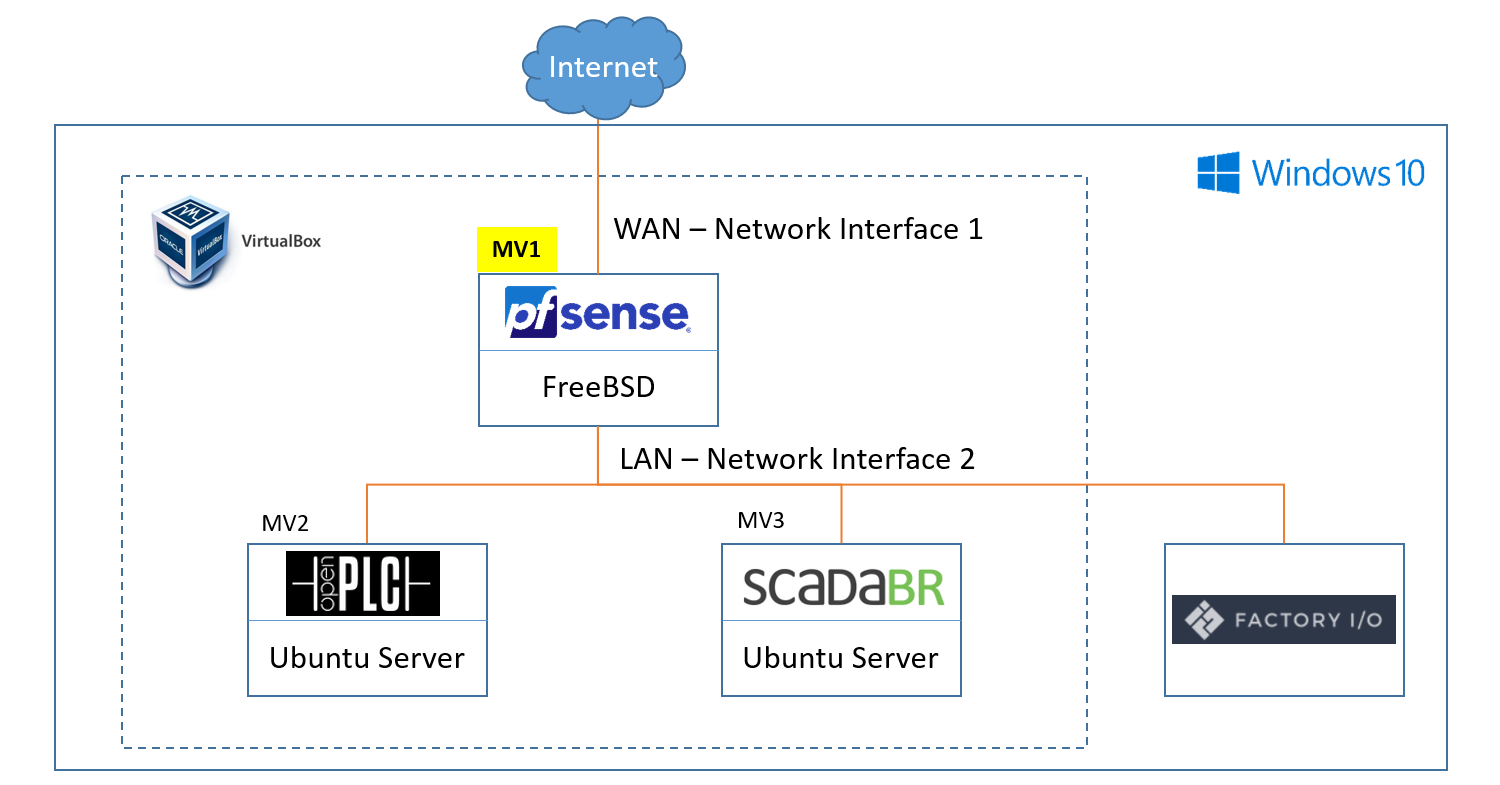
As we can see in the diagram, the router is going to need 2 interfaces: one external to access the internet (WAN), and one internal for all our virtual machines to connect to (LAN), and here is where we have the first challenge: which network adapter should we choose in VirtualBox for each one of them?
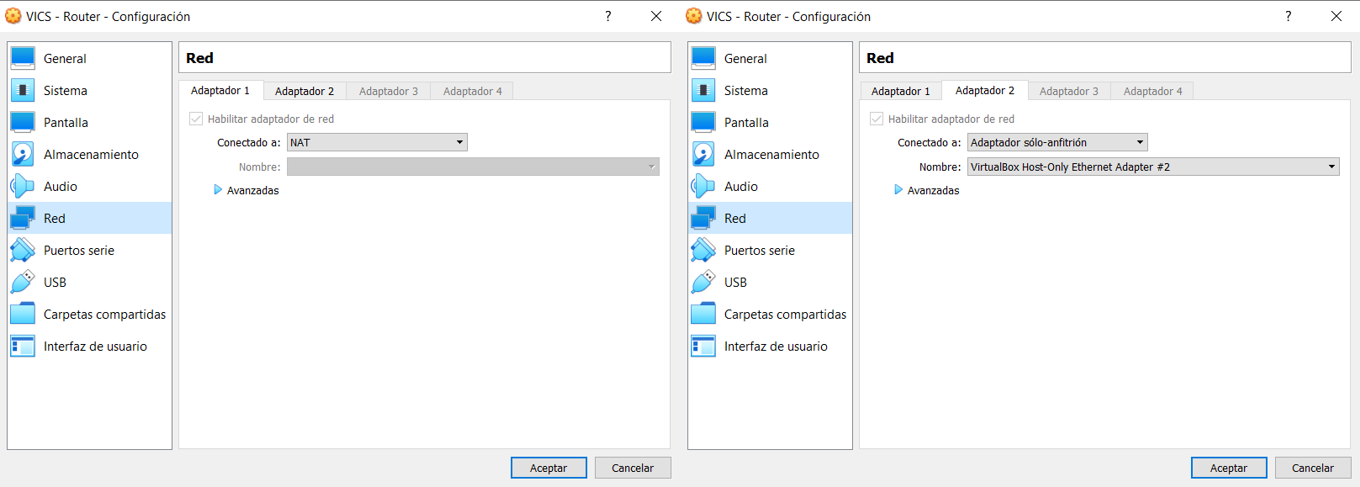
TL;DR: we will need to set up the WAN interface as NAT, and the LAN as Host-Only (as can be seen in the image above), but if you want to know why, keep reading.
VirtualBox Networking Modes – Choosing the Right Adapter
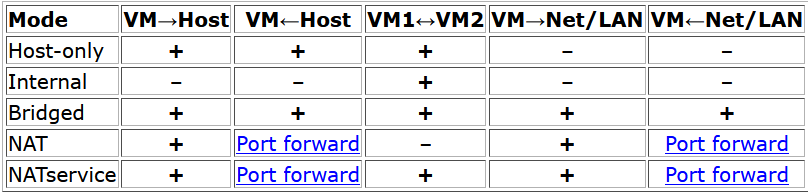
There are several kinds of networking modes that we can choose for our virtual network adapters, each one of them with a certain set of characteristics and properties (very well described in VirtualBox documentation) that we need to take into consideration for our setup to work as expected. On a high level, we can find:
- Host-Only: the virtual machine is assigned an IP, but it is only reachable by the host. It is usually used to create a network between the host and several VMs.
- NAT: the virtual machine is assigned to a different subnet and can access the network outside the host, but access from the host to the VM is not allowed unless ports are forwarded.
- Bridge: the VM will be on the same network as the host. e.g.: If the host has an IP of 192.168.20.22, the VM will be something like 192.168.20.23 and be accessible by all of the elements in that network.
Having in mind the above-mentioned considerations, and possible requirements from the design, we can now proceed to choose the right networking mode for our adapters:
- Network Adapter 1 – WAN
- Shall be able to access the internet, without any other additional consideration so will be configured as NAT.
- It is not necessary to create any new network adapter for that purpose, we can use the native option in VirtualBox
- Network Adapter 2 – LAN
- Shall be accessible by the host because we will use it to access the web application of pfSense
- Does not need internet access
- We will use a Host-Only adapter
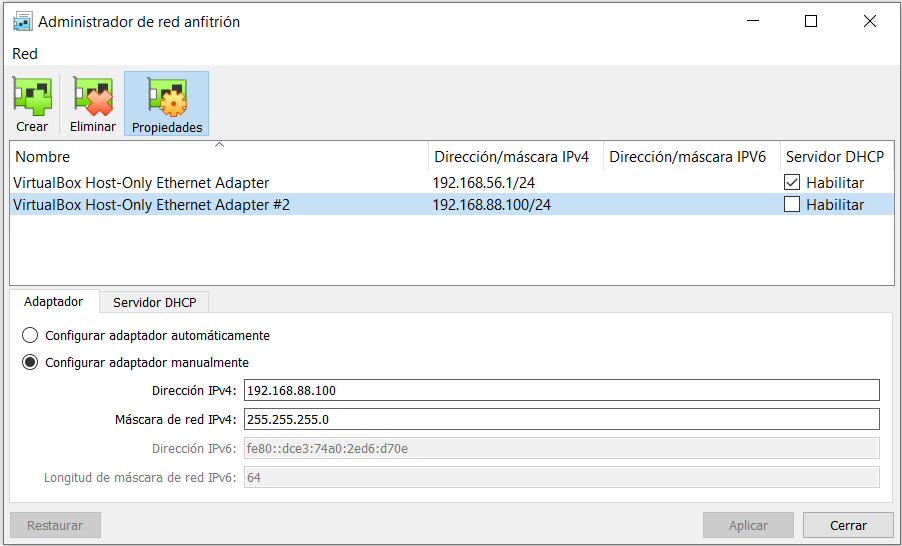
- It will be necessary to create that adapter from scratch in VirtualBox
- In order to create that adapter, once in VirtualBox open the network administrator by pressing CTRL+H
- Click on “Create” and set up the desired IP for it (In my case 192.168.88.100). It is very important to not give it 192.168.88.1 as it will not work
(and I am not sure why, if you do please let me know in the comments)Solved. Thanks Leonard!
Installation and Setup of pfSense
With the basics out of the way, let’s now proceed with the installation of the router, in order to do that:
- Download and unzip pfSense ISO
- Create a new virtual machine
- type: BSD
- version: FreeBSD 64Bit
- Make sure to assign the adapters properly
- Adapter 1: NAT
- Adapter 2: Host Only (the one we just created)
- Configure as boot media the ISO for pfSense we just downloaded
- Turn on the virtual machine
- Follow the instructions that appear on the screen without any additional consideration to finish the pfSense installation
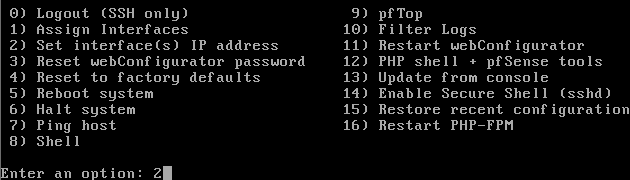
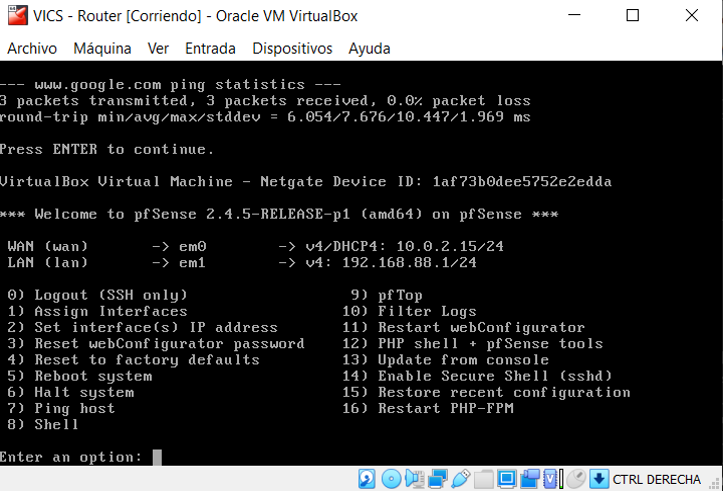
Once finished the installation, we should be able to see correctly the networks interfaces configured in pfSense (see image below), and access the administration web portal from the browser by going to the address stated in the command line:
- https://192.168.88.1
- user: admin
- password: pfsense

Congratulations! Now you are ready to continue with the installation of OpenPLC and ScadaBR.
Note: it is possible that pfSense starts with the wrong LAN IP assigned (e.g.: 192.168.88.1), in that case it will be necessary to change it manually to our target IP using the command line:
- Select option2 (Set interface IP) and press enter
- Select option2 (interface1) and press enter
- Introduce 192.168.88.1/24
- Enable DHSP in that interface
- Configure a range smaller than the total range, so we can properly assign static IPs later on, for example:
- Start: 192.168.88.10
- End: 192.168.88.200