Virtual Industrial Cybersecurity Lab – Part 5: Installation of the Attacker Machine
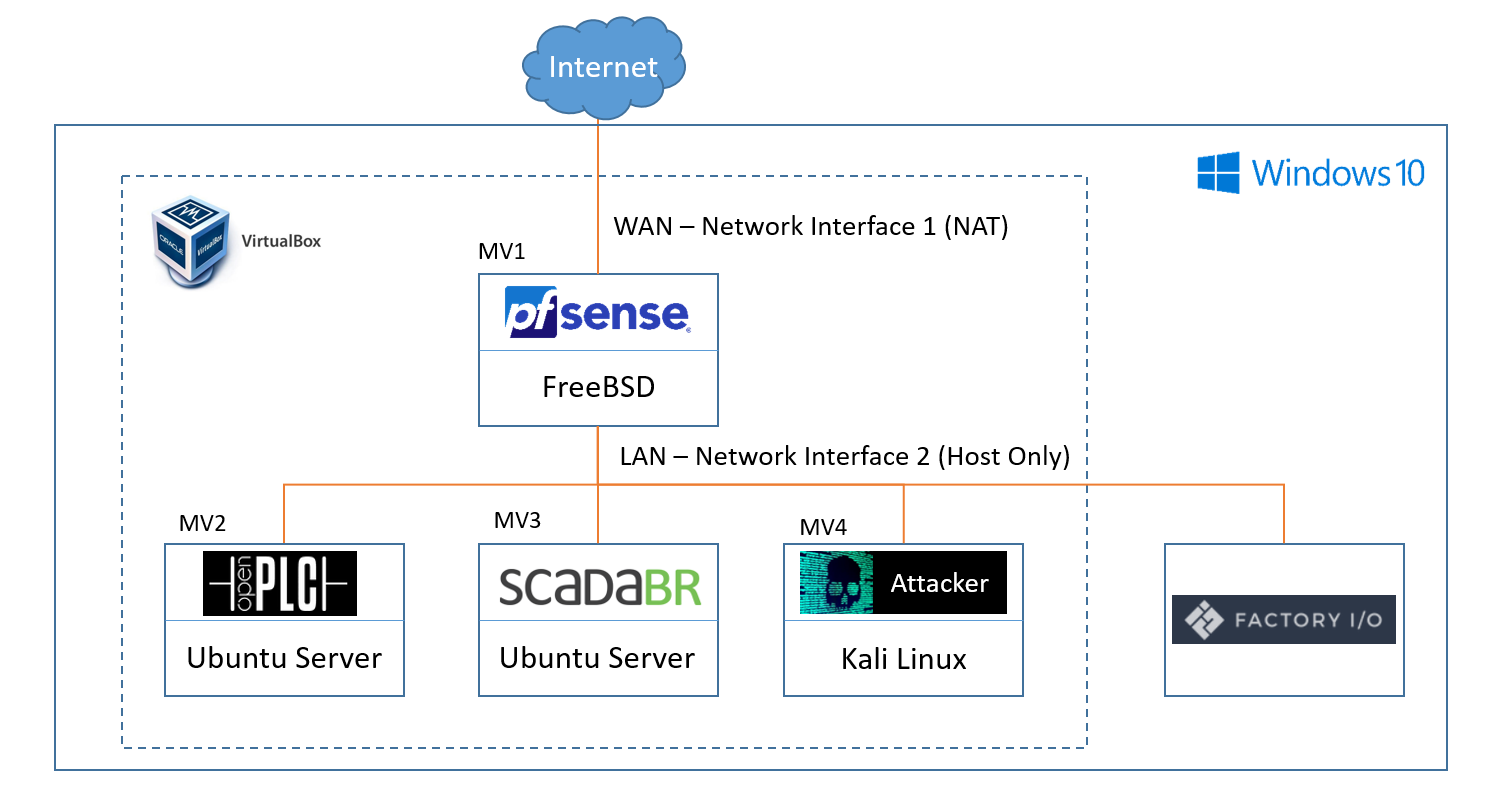
At this point, you should already have a physical process in FactoryIO controlled with OpenPLC. Now I will explain how to configure the virtual machine that will be used as the attacker, as can be seen in the following diagram:

This is going to be a short post given that there is plenty of documentation available on how to install Kali Linux on VirtualBox, so I will only focus on the necessary considerations and configuration changes needed in order to correctly integrate the machine into the Laboratory.
The main difference between this machine and the others (pfSense, OpenPLC, ScadaBR) is that we will be working with a graphical environment, and some hacking tools will require a certain amount of computing power. For those reasons, it is recommended to max out the resources allocated to this machine as much as possible in order to have a decent user experience with it.
With this in mind, we can now proceed to download Kali Linux 64-bit (Installer) ISO and proceed with the installation, taking into account the following considerations:
- Type: Linux
- Version: Other Linux (64 bits)
- RAM: maximum capacity allowed by your host, without interfering with the rest of the Virtual Machines
- Processor Number: maximum amount allowed by your host
- Video Memory: maximum capacity allowed by your host, without interfering with the rest of the Virtual Machines
- Network Adapter:
- Configured in Host-Only mode
- Use the same adapter created in Part 1, (used by the LAN side of the router and the rest of the virtual machines).
- It is very important to configure the adaptor in Promiscuous Mode because this will allow us to use Wireshark later on
- Keep in mind that for this machine to reach the internet, you need to have the pfSense machine running

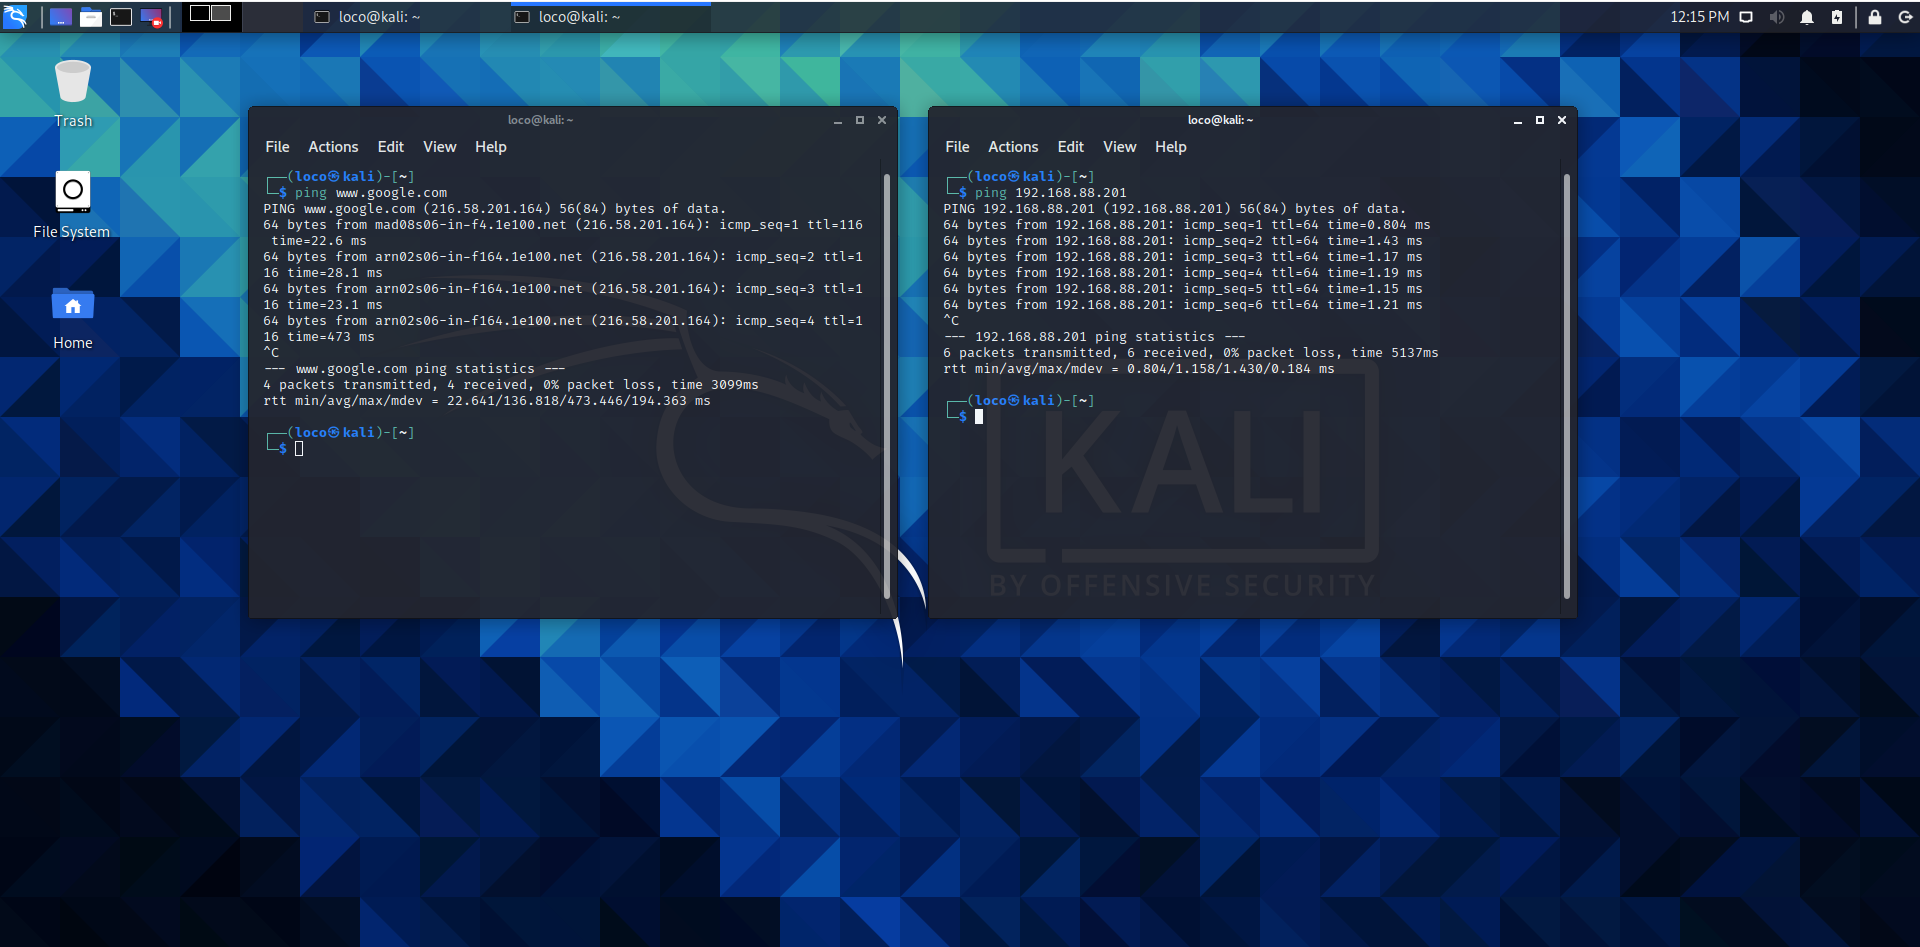
Once the installation finishes, you can now ping google and OpenPLC (for example) in order to check that everything works properly.
