Virtual Industrial Cybersecurity Lab – Part 2: Installation of OpenPLC and ScadaBR
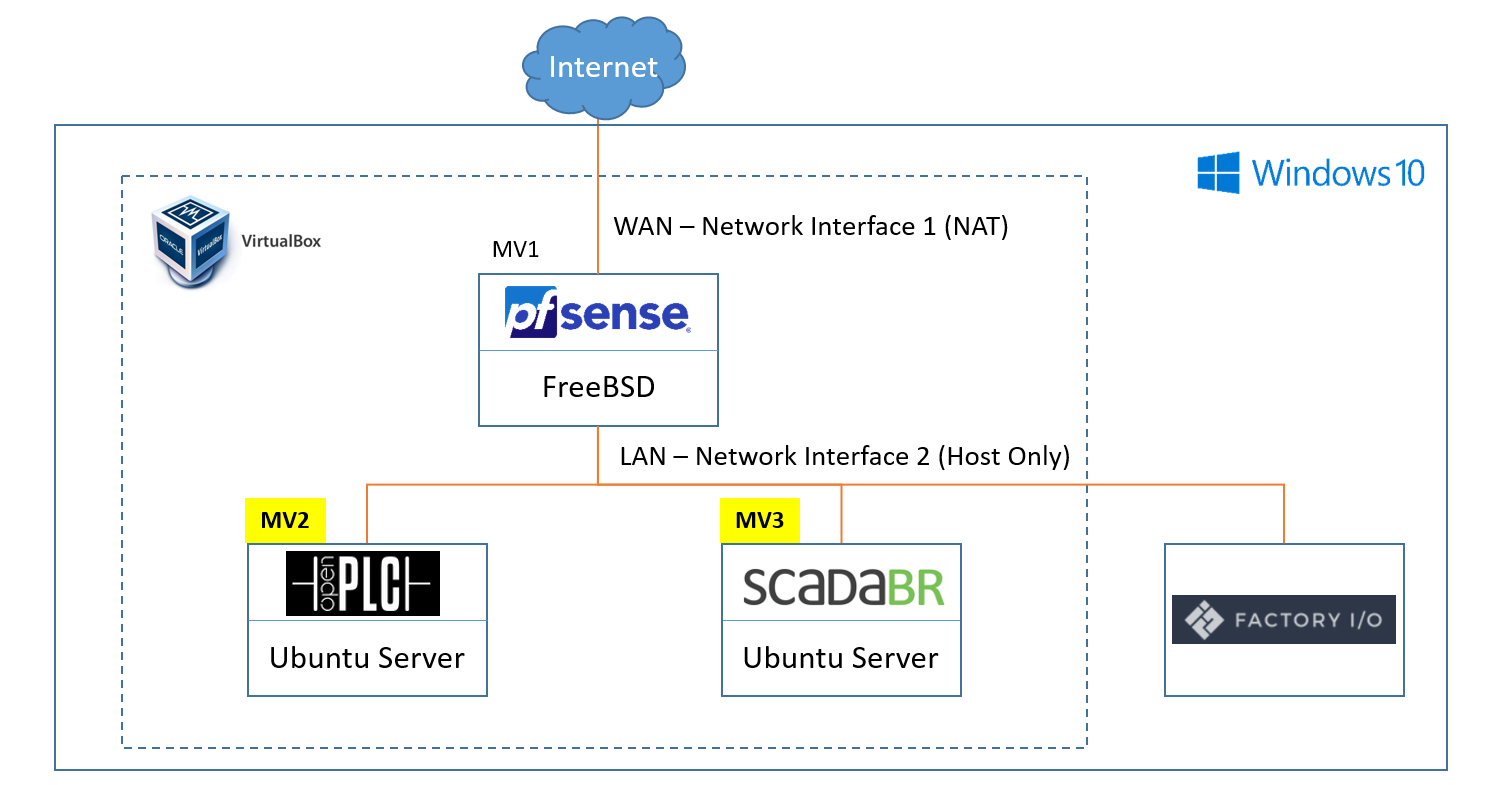
In the previous part, we configured a virtual pfSense router to orchestrate the communications between the la equipment: Now, we will see step by step how to install OpenPLC and ScadaBR on 2 separate Ubuntu servers, following the target design:
Installing OpenPLC and ScadaBR
It is true that on a technology level, it is very well possible to install both applications on the same machine, but I want to replicate as much as possible the physical structure of a real environment, in which a PLC and HMI are different devices that communicate through the network.
We begin by downloading Ubuntu Server and installing it in 2 independent virtual machines, keeping in mind that:
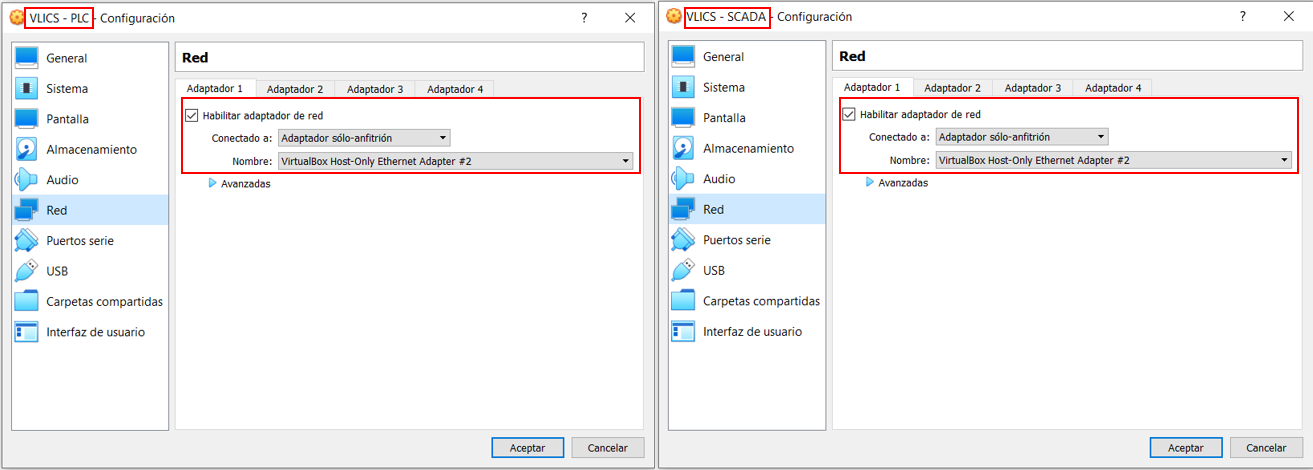
- It is necessary to configure the same adapter for both machines
- It needs to be the same adapter used for the LAN interface of the pfSense router
- pfSense virtual machine needs to be turned on so that the newly created machines can access the internet and download the necessary updates
Once finished the installation of both servers, it is recommended to assign them a static IP in pfSense so we can save the web applications to OpenPlC and ScadaBR in the bookmarks tab for easy access. to do that, one can follow these steps:
- Access pfSense’s web application portal (in our case https://192.168.88.1/ )
- Once logged in, go to “Status > DHCP Lease”. There you will see 2 connected devices (one for each virtual machine)
- For each connected device, access the configuration and assign a static IP outside of the DHCP range assigned to the router during the initial setup.

- Once assigned the static IPs, reboot both machines, and refresh pfSense’s console in order to check that both of them are correctly assigned and online.

It is also recommended to check that both machines have internet access, and can see each other, in order to do that:
- From MV2: ping www.google.com
- From MV2: ping 192.168.88.202 (ping to MV3)
- From MV3: ping www.google.com
- From MV3: ping 192.168.88.201 (ping to MV2)
Installation of OpenPLC in MV2
I am not going to go into very deep detail about this, as there are some pretty detailed instructions on how to do in on the official site,but in summary you need to execute the following commands:
git clone https://github.com/thiagoralves/OpenPLC_v3.git
cd OpenPLC_v3
./install.sh linux
Once finished the installation, you will be able to access OpenPLC’s web portal from your host’s machine browser:
- https://192.168.88.201:8080
- user: openplc
- password: openplc
- Save this address in bookmarks for easy access later on
- OpenPLc will autostart every time with the virtual machine

Installation of ScadaBR on MV3
Same way as before, there are some pretty detailed instructions on how to install ScadaBR on their site, but in summary you need to execute the following commands:
git clone https://github.com/thiagoralves/ScadaBR_Installer.git
cd ScadaBR_Installer
./install_scadabr.sh
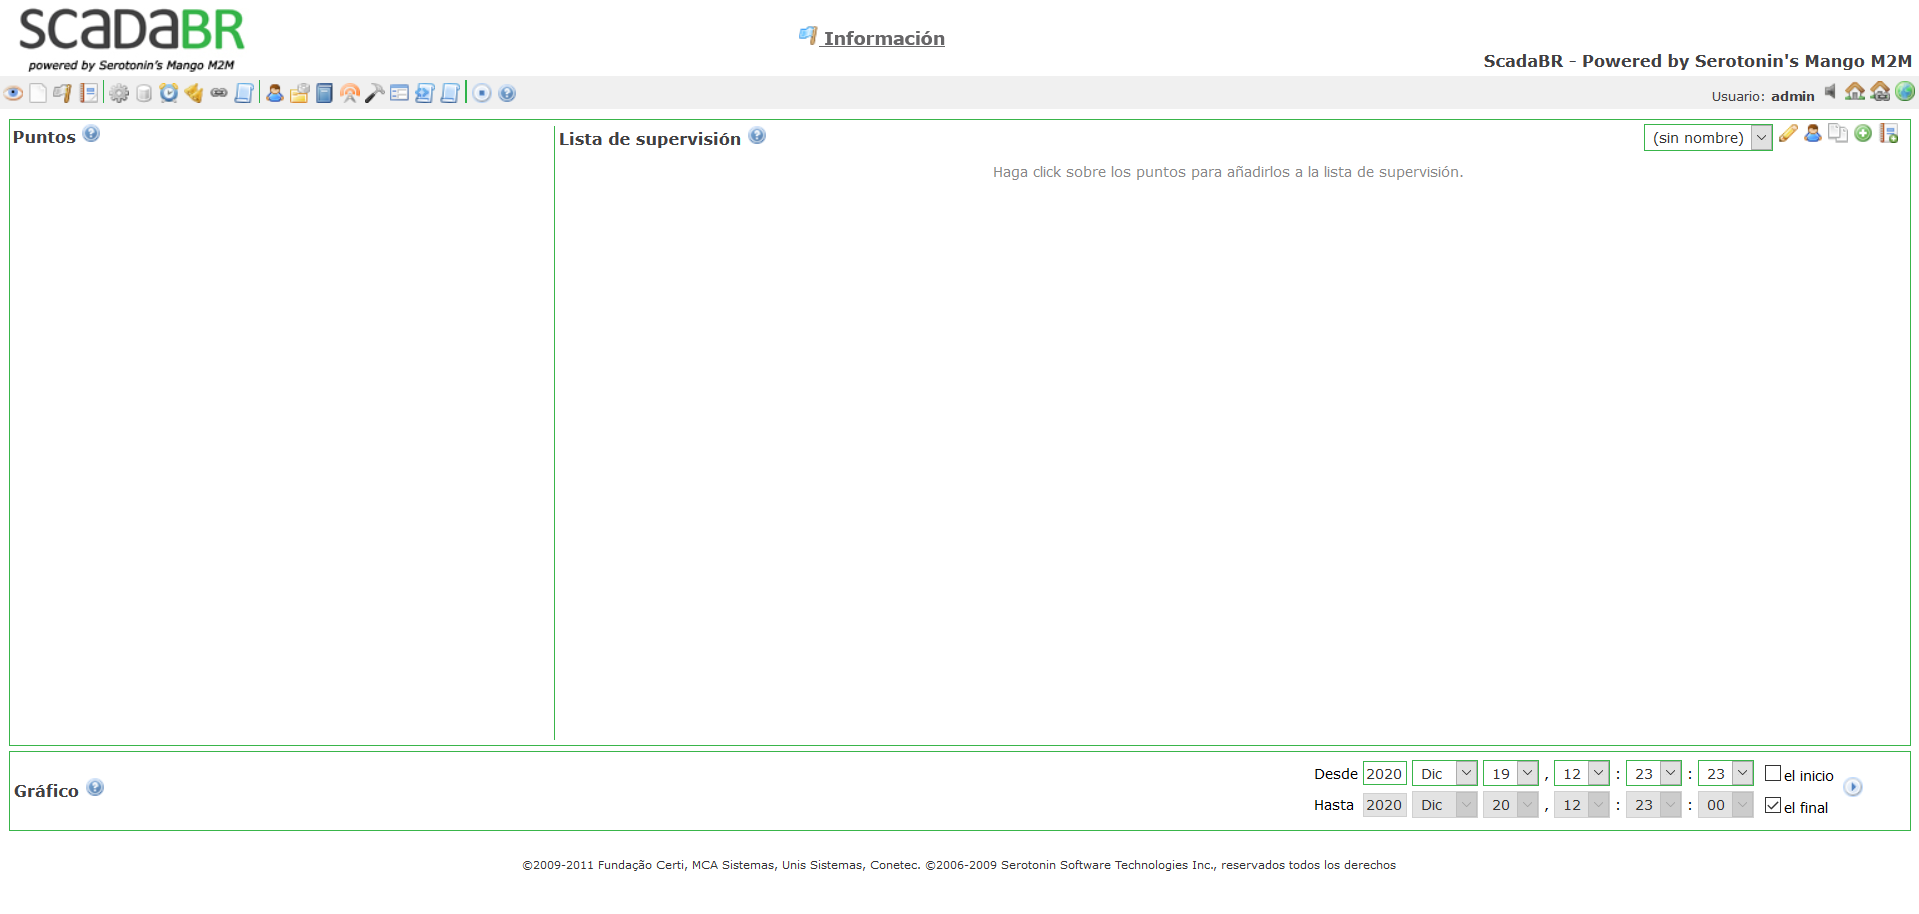
Once the installation is finished, you should be able to access ScadaBR’s web portal:
- http://192.168.88.202:9090/ScadaBR
- user: admin
- password: admin
- Save this address in bookmarks for easy access later on
- ScadaBR is not configured to autostart every time with the virtual machine
It is recommended to update the software to the latest version (1.0), just make sure you log into the tool at least once before doing so or you could en up with a corrupt installation. To update ScadaBR, execute:
./update_scadabr.sh
If you want to start ScadaBR manually each time, you will need to execute the following command:
sudo /opt/tomcat6/apache-tomcat-6.0.53/bin/startup.sh
If you want ScadaBR to autostart on boot (I think it is better), you will need to create a cronjob
sudo nano ctontab -e
Write at the end of the file the following command:
@reboot /opt/tomcat6/apache-tomcat-6.0.53/bin/startup.sh
Save the changes and exit the editor wit with CTRL+X

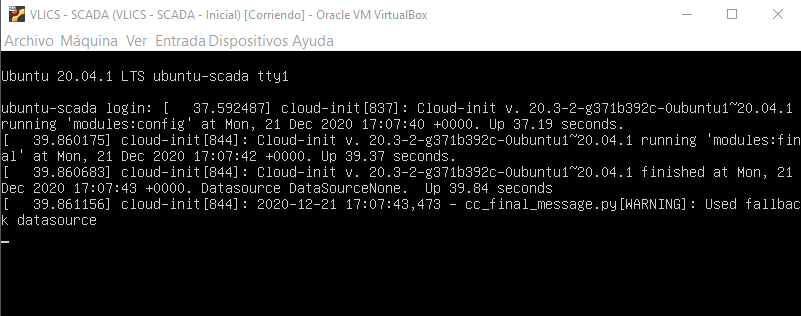
Note: You can deactivate cloud-init if you see a warning when starting the virtual machines:
sudo touch /etc/cloud/cloud-init.disabled
Congratulations!
Now everything is ready to work between the 3 virtual machines, and move on with the physical process simulation.