Configure a Secure and Private DNS Server with Pi Hole and Unbound
A local DNS server will allow you to assign humanly readable addresses to your services, and therefore enable a simpler way to access them.
Even though in the beginning it may seem easy to remember several IP+Port combination to access local services, once the number of self-hosted services of your Homelab grows over a certain threshold, the complexity of doing so adds up pretty quickly.
That alone is a significant quality of life improvement, but, why stop there?
There are tools which can provide security and privacy on top of that by leveraging:
- DNS Filtering: consists of a process to block or control access to certain domains by manipulating DNS queries from clients.
- Advantages:
- Privacy: prevents sending use and activity data to telemetry servers
- Security: blocks access to known malware sites, and can even contain the damage of an infection by preventing a successfully installed malware to communicate with its command and control server
- Network wide ad blocking: avoids ads being served to every device on your network, without the need of installing any solution in each on of them individually
- Data savings: by stopping communication with ad servers, there will be fewer data downloaded to your device in the form of banners or videos
- Parental control: can be used to control access to sites that may be harmful for children
- Limitations:
- DNS filtering is mainly based on the use of blacklists for known malware domains, therefore it can only block domains that are known to be used for that purpose. In advanced attacks, it is common to utilize clean domains in order to prevent such kind of measures
- Similarly, ad blocking will only be successful when ads are served from a domain known to be used for that purpose. This is not the case for certain sites such as YouTube, for which different measures are required
- Adding multiple blocklists can lead to some legitimate services not functioning properly, however, this is highly unlikely when using only Pi Hole default ones
- Advantages:
- Recursive DNS queries: instead of contacting a single DNS server in order to receive the IP associated to a domain, several servers will be queried consecutively to that purpose. For example, in order to resolve rodrigocantera.com, first the default DNS server of your network (most likely the one set by the ISP on your router) will be queried to know which is the authoritative server for “.com”, then, that server will be queried to resolve the IP for rodrigocantera.com. This is of course a simplification and I recommend referring to this article for a more in depth view of the workflow.
- Advantages: no single server will be able to know every site visited by your client, spreading that data around multiple authoritative servers instead of having everything resolved by your ISP
- Limitations:
- Having to perform multiple queries to resolve a domain has a small penalization in terms of latency. However, this is only relevant the first time that a site is visited, as the query will be cached locally and retrieved almost instantaneously in further accesses
- DNS traffic is not encrypted and therefore your ISP will still be able to perform deep packet inspection to know which sites you are visiting. In order to prevent this, DNSSEC or a VPN would be required
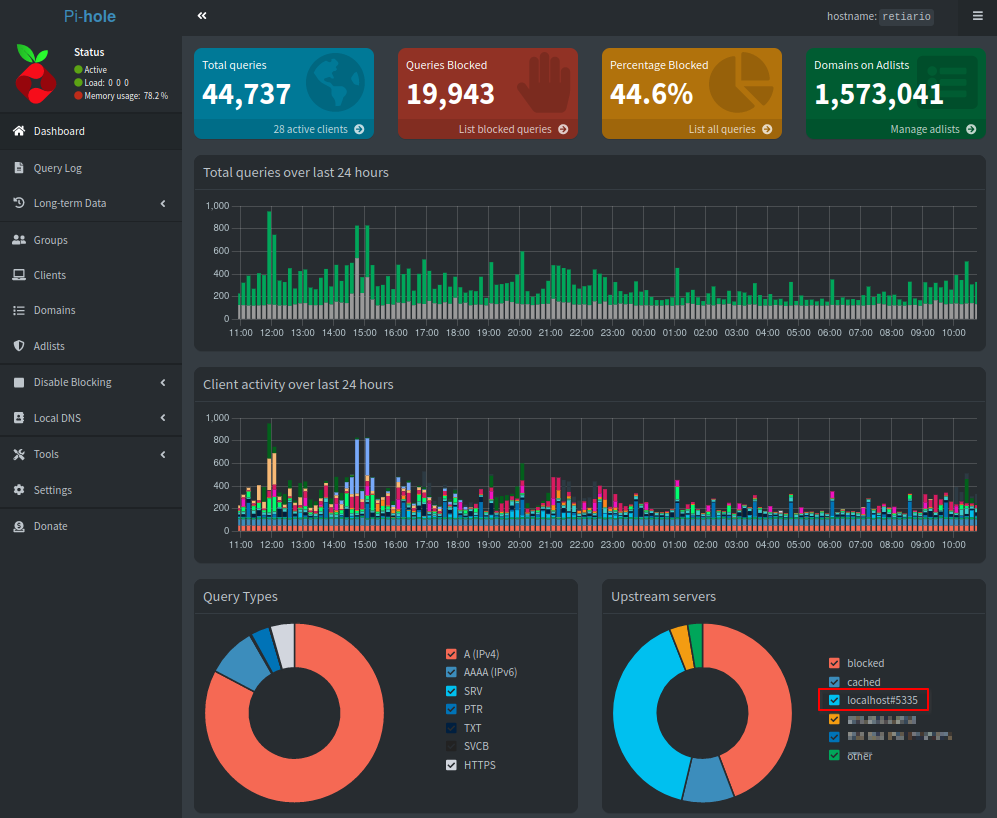
There are plenty of tools that can be used to this objective, but I personally like Pi Hole due to its simplicity and clean user interface, and its easy integration with Unbound.
Once the toolset is chosen, the next decision is where to deploy it. In this case I will go for a dedicated virtual machine instead of other technologies such as Docker.
By this point and if you have followed the previous articles (server, hypervisor), you should already have all the necessary tools to deploy your secure and private local DNS setup:
- Create a virtual machine in Proxmox and install an Operative System which is compatible with the chosen tools (I tend to use Ubuntu Server LTS)
- Follow Pi Hole’s installation manual
- Setup Pi Hole as the default DNS server for your router, this will allow every device of your network (attention: not every router allows this, specially ISP ones)
- Install and configure Unbound
- (Optional) Extend the default Pi Hole block lists
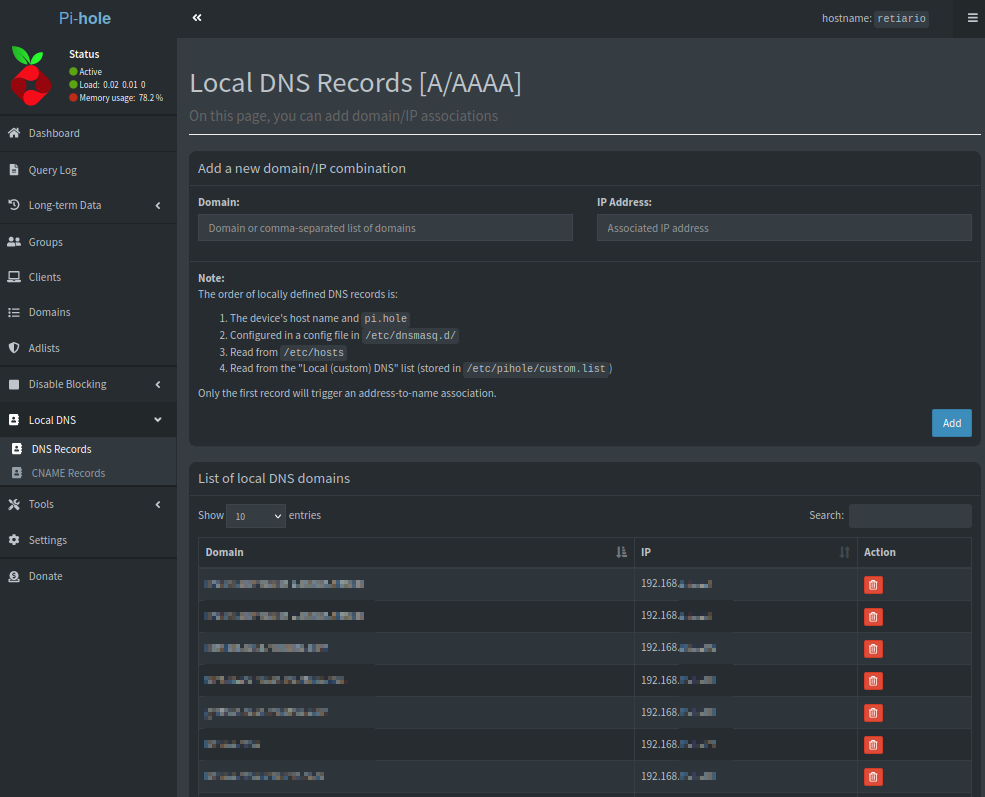
- Add local domain names to Pi Hole as desired
Congratulations! Now you are ready to integrate this DNS server into your Homelab!