Configure Proton VPN on a UniFi Router
In this article, I will explain how to configure Proton VPN on a UniFi router and the key factors to consider when doing so.
Main benefits of a router based VPN
- Can be used by any device: installing the VPN app on a phone, or configuring a VPN natively in a computer is straightforward, but that is likely not possible for every single device that is connected to your home network, with the most usual offenders being cloud-based IoT devices.
- Simplified configuration and maintenance: manually configuring every single device is time-consuming. By setting up the VPN natively in the router, it will be possible to overcome that situation as it allows to centrally determine which traffic will be sent through the VPN.
- No device number limitations: certain VPN providers may enforce a limit on the number of individual clients that can concurrently make use of a VPN account. This setup allows to use the VPN for as many devices as supported by your home network.
Some limitations of a router based VPN
- It cannot be easily switched on, off, or modified: sometimes it may be necessary to use your native connection to access certain pages, or a certain site may not be available for the chosen location of your VPN. In those cases, it is quite inconvenient to access the router and make the changes at a global level. That is the reason why I always include a “clean” wireless SSID in my network designs (see my previous article IoT Network Segmentation Guide – Design). Temporarily switching to that SSID allows to overcome those hurdles.
- Impact in download throughput: obviously, a VPN will add some lag and throughput limitations to your internet traffic. These limitations can vary based on your VPN provider and the chosen protocol. I found his impact negligible in the case of a WireGuard based tunnel with Proton VPN, but your mileage may vary
- Streaming devices incompatibilities: some streaming platforms such as Amazon Prime Video have already started to implement blocks against VPN users, therefore you may need/want to exclude those devices from the VPN.
How to configure Proton VPN on a UniFi router
1. UniFi Dream Router supports 2 protocols: OpenVPN and WireGuard. There are extensive analysis comparing both of them but in summary, WireGuard tends to be the preferred option due to a better performance
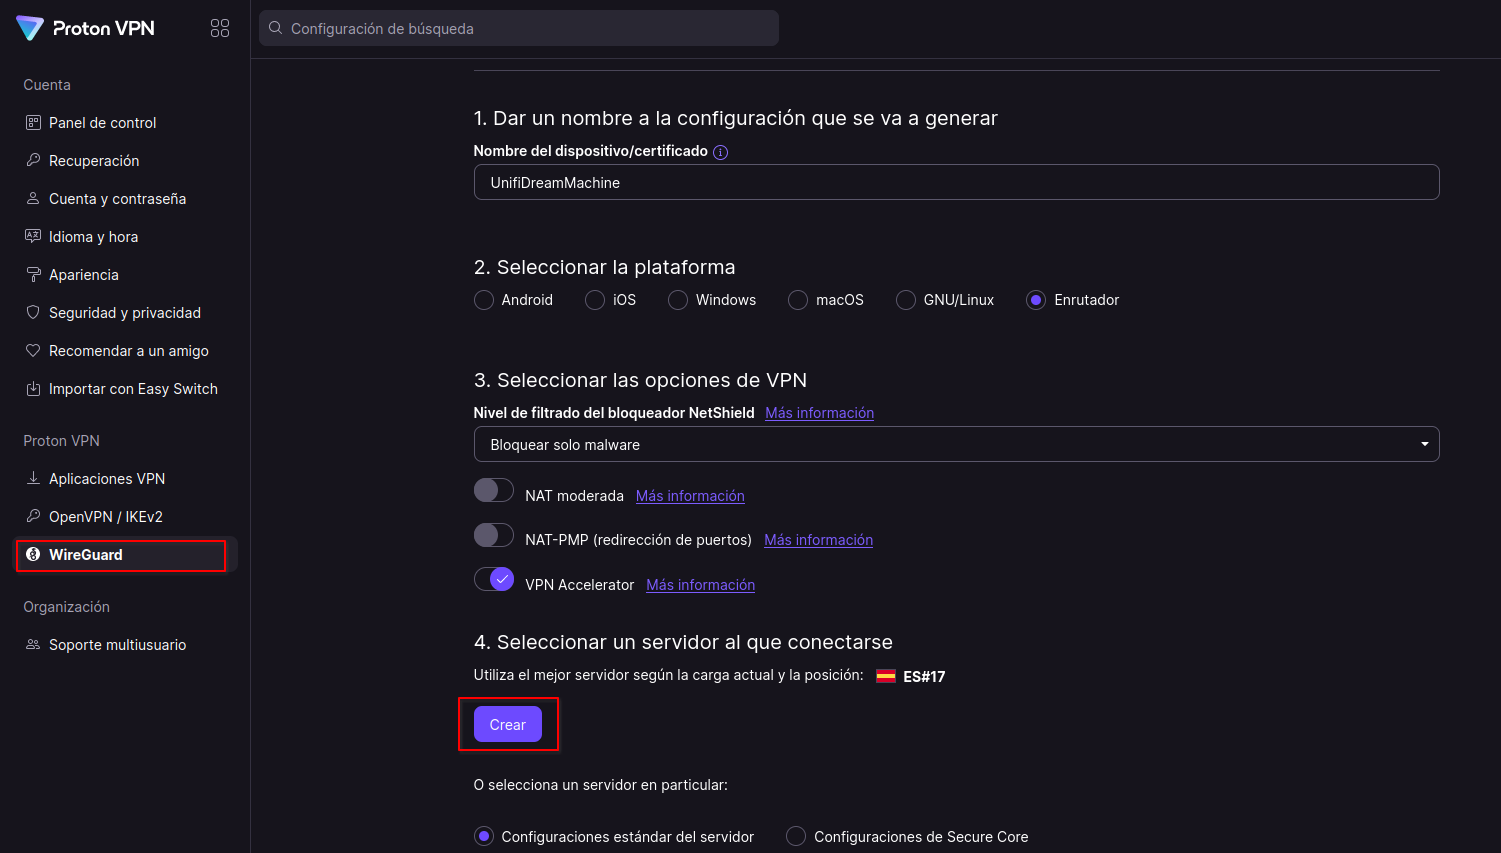
2. Create the configuration file in proton VPN web portal and choose the settings of your liking.
Tip: I cannot capture this in the picture because when changing the server, the configuration file automatically downloads without any changes in the UI, but I chose a Swiss server. The reason for choosing Swiss server is that it enhances privacy, as it is outside the 14 Eyes Agreement
4. Download the config file and go to your UDR console -> VPN -> VPN Client -> Create New -> WireGuard. Give it a name and upload the configuration file
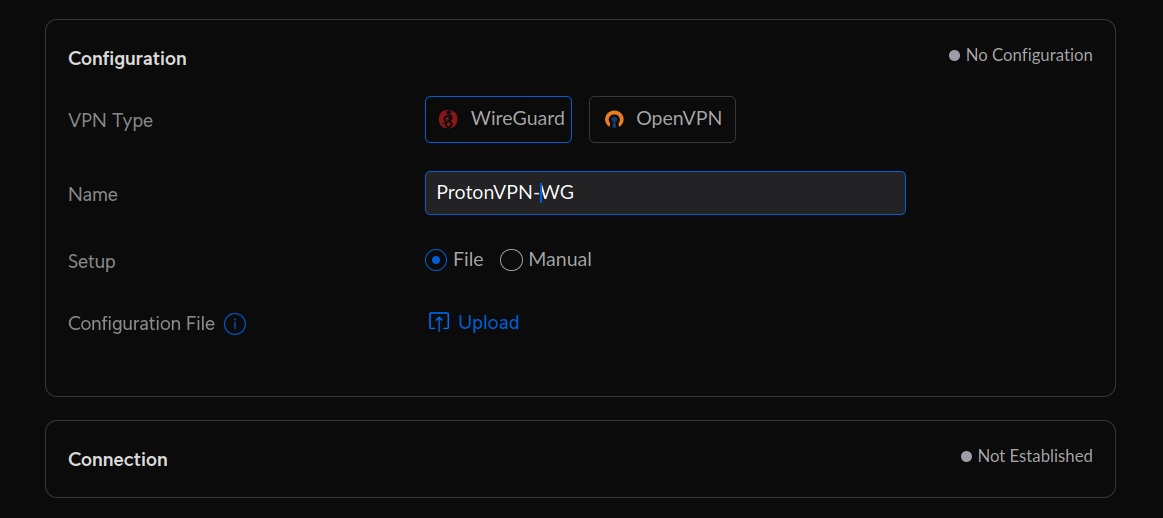
5. When this is done, check that the tunnel was established successfully

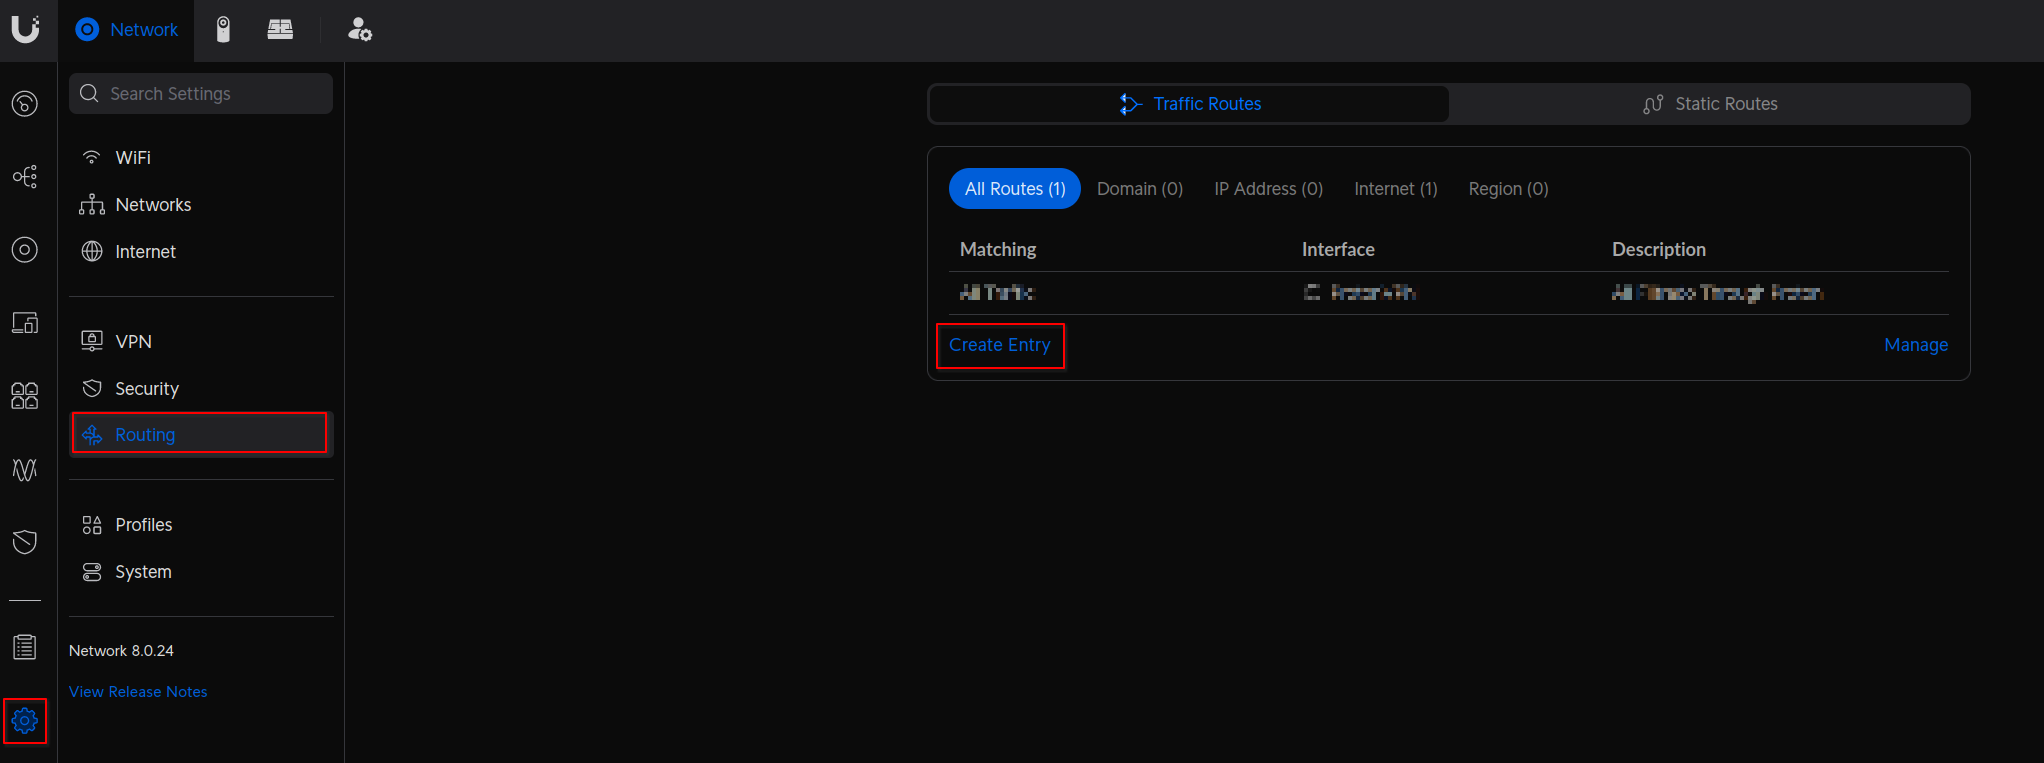
6. Create a new traffic route by clicking in Configuration -> Routing -> Traffic Routes -> Create Entry, in your UniFi Dream Router
7. Select which traffic will be sent through Proton VPN (see my previous article IoT Network Segmentation Guide – Design to learn why I chose those specific networks).
Tip: UniFi also allows to choose specific devices instead of whole subnets, which may be interesting for some cases
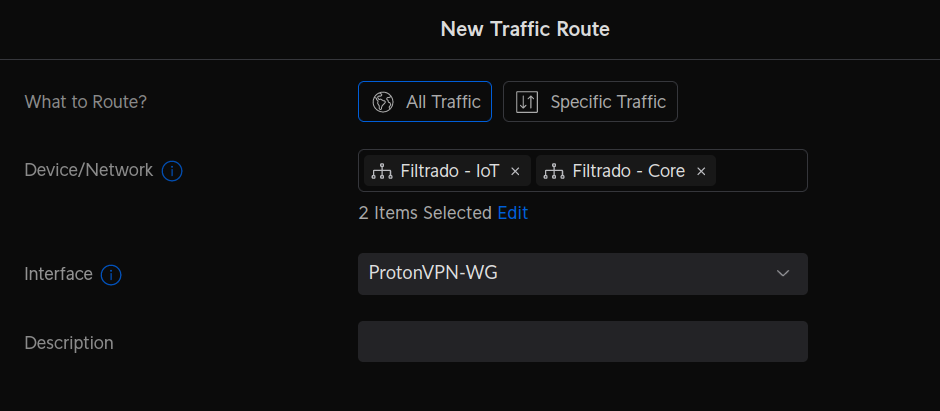
8. Click “Apply and Create” and that will be it!
If you are interested on replicating this setup, you can use my referral link for Proton VPN ;).
Also, you can have a look at the “How to Set up a Homelab” series, and follow me on X (formerly twitter) to not miss any article.
Happy testing!